

Learn how I design and weave my tapestries: from concept to cloth
During 1990-1991 I was Artist-in-Residence at the New York Center for Tapestry Arts in New York City. While there, I documented the process I went through to design and weave my tapestry BITTER HARVEST.

The initial inspiration for my tapestry BITTER HARVEST was this medieval carved statuette base portraying the Serpent and Eve in the Garden of Eden.

BITTER HARVEST, 1991. Wool, silk, and gold. 152 x 66 cm. Private collection, USA.
Ivory statuette base, 1470-80. Boxwood. 8.9 x 12.4 x 8.6 cm. Metropolitan Museum of Art. New York.
Lots of hard copy research in the libraries - long before online image searches!

I was intrigued by the aesthetics and techniques of medieval tapestries. The drop-pattern of beasts in the background behind the hero inspired my own drop-pattern of fire-breathing rats.

Detail: Alexander the Great or Hector of Troy: The Nine Heroes Tapestries. ca.1400-1410.Wool warp & weft. 420 x 264 cm. Metropolitan Museum of Art, NYC.
I have always used collage as my design method. These days I used computer software, but back then it was paper, pencil, scissors, and the photocopier. The layers of the collage are unified by tracing on mylar. The full-scale drawing for a tapestry is called the “cartoon”.

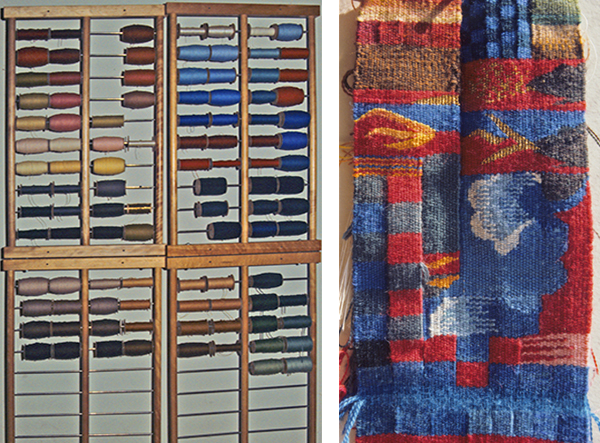
Next is colour sampling & blending, and exploration of techniques and approaches. The coloured yarns for weaving are called the “weft”. The shiny fibre on the second spool rack is gold-wrapped silk; I used the gold for the fire-breathing rats.
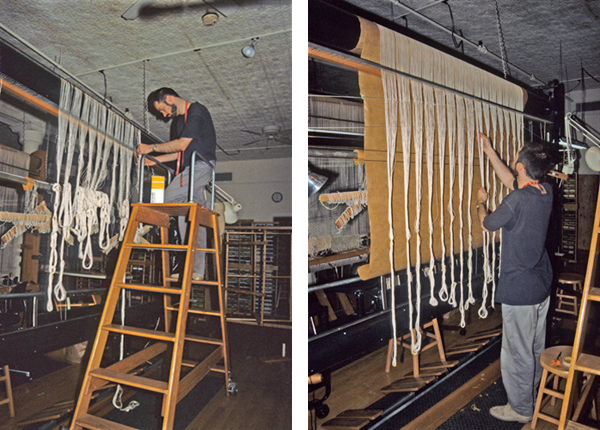
The “warp” is the name given to the threads attached to the loom. Here I am measuring off the warp threads to a standard length. 604 warp threads were needed for this tapestry.

It is a complex process getting the warp onto the loom. The warps are first attached to the top roller “beam” of the loom. This is a “high warp” loom because the warps are orientated vertically.
The warps are individually threaded through a set of string loops called “heddles” which are attached to “harnesses”; together, with foot pedals, they are integral part of the mechanics of operating a loom.

Once threaded through the heddles the warps are attached to the bottom beam of the loom. All the warps need to be of the same tension: a long process working with individual warps to make them as tight as their neighbours.

The warps now need to be evenly spaced once they are evenly tensioned. A pointed “bobbin” is loaded with weft to weave over and under the warps; the bulk of the weft helps to spread out the warps evenly across the weaving width of the tapestry.

Finally, the weaving begins (sort of): first a hem needs to be woven. The hem will eventually be turned and sewn to the back side of the tapestry to finish off the exposed warps.

The mylar cartoon is placed behind the plane of warps and the design is drawn onto the warp threads. Weaving a tapestry is a bit like colouring in a colouring book: the black lines tell the weaver where one colour starts and stops.

Tapestries are frequently woven perpendicular to the direction they will hang on the wall.I choose to weave with the back side of the tapestry towards me; other artists weave with the finished side of the cloth towards them.

This is what faces me as I weave. Because I weave from the back, my inked-on cartoon has to be the mirror image of the actual design. I can spread the warps and look through to a mirror hanging on the far side of the plane of warps to see how the tapestry looks at the front.

If I lower the mirror (bottom left) and walk around to the other side of the loom, I can look at the developing cloth (and pray I like what I see: including the fire-breathing rats!).

Here the tapestry is almost finished; a top hem still needs to be woven. You can see the mirror and both sides of the cloth.

The weaving is finished and the tapestry is cut off the loom!

There is still a lot of work that needs to be completed once the cloth is off the loom; not my favourite part of the process.

The extra weft ends need to be trimmed short to reduce bulk on the back of the tapestry so it hangs smoothly on the wall. At the lower right, you can see the strip of hem and the finished warp ends.

A tapestry is not smooth when it comes off the loom. Once the finishing is complete the tapestry is squared and pinned to a blocking board. Steam heat is used to shrink the cotton warp and wool weft to keep the tapestry square. Afterwards the hems are bound, then the tapestry is ready to hang on the wall.

There you have it - concept to cloth.

